serverless framework 시작하기
이전편 : serverless framework로 AWS에 데이터 파이프라인 구축하기
목표
serverless framework를 설치하고, AWS와 연동해보자.
1. install node.js & npm
node.js와 npm을 설치한다. ubuntu 18.04에서 설치.
sudo apt-get update
sudo apt-get install nodejs
sudo apt-get install npm
설치 후 확인을 위해 버전을 출력한다.
node -v
# v12.13.1
npm -v
# 6.13.4
2. install serverless
serverless 프레임워크 설치.
npm install -g serverless
설치된 serverless 프레임워크의 버전을 확인해보자.
sls -v
다음과 같이 출력되면 serverless framework가 설치된 것이다.
Framework Core: 1.83.0
Plugin: 3.8.4
SDK: 2.3.2
Components: 2.34.9
3. serverless 프로젝트 만들기.
serverless 프레임워크에는 수많은 템플릿이 있다. 이 템플릿으로 프로젝트를 간편하게 생성할 수 있다. 템플릿을 확인해보자.
sls --help create
Plugin: Create
create ........................ Create new Serverless service
    --template / -t .................... Template for the service. Available templates:
                                             "aws-clojure-gradle", "aws-clojurescript-gradle", "aws-nodejs", "aws-nodejs-typescript", "aws-alexa-typescript", "aws-nodejs-ecma-script", "aws-python", "aws-python3"
                                             "aws-groovy-gradle", "aws-java-maven", "aws-java-gradle", "aws-kotlin-jvm-maven", "aws-kotlin-jvm-gradle", "aws-kotlin-jvm-gradle-kts", "aws-kotlin-nodejs-gradle", "aws-scala-sbt"
                                             "aws-csharp", "aws-fsharp", "aws-go", "aws-go-dep", "aws-go-mod", "aws-ruby", "aws-provided"
                                             "tencent-go", "tencent-nodejs", "tencent-python", "tencent-php"
                                             "azure-csharp", "azure-nodejs", "azure-nodejs-typescript", "azure-python"
                                             "cloudflare-workers", "cloudflare-workers-enterprise", "cloudflare-workers-rust"
                                             "fn-nodejs", "fn-go"
                                             "google-nodejs", "google-python", "google-go"
                                             "kubeless-python", "kubeless-nodejs"
                                             "knative-docker"
                                             "openwhisk-java-maven", "openwhisk-nodejs", "openwhisk-php", "openwhisk-python", "openwhisk-ruby", "openwhisk-swift"
                                             "spotinst-nodejs", "spotinst-python", "spotinst-ruby", "spotinst-java8"
                                             "twilio-nodejs"
                                             "aliyun-nodejs"
                                             "plugin"
                                             "hello-world"
    --template-url / -u ................ Template URL for the service. Supports: GitHub, BitBucket
    --template-path .................... Template local path for the service.
    --path / -p ........................ The path where the service should be created (e.g. --path my-service)
    --name / -n ........................ Name for the service. Overwrites the default name of the created service.
프로젝트 생성은 다음과 같은 명령어로 할 수 있다.
sls create -t {원하는 템플릿} -p {원하는 프로젝트 이름}
나는 python으로 돌아가는 Lambda 함수를 만드려고 하니까 “aws-python3” 템플릿으로 프로젝트를 생성한다.
sls create -t aws-python3 -p srcr-etl
IDE(IntelliJ 사용)에서 확인해보니 프로젝트가 생성되었다.
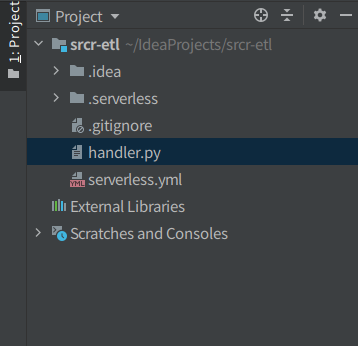
디렉토리 구조를 보면 serverless.yml과 handler.py로 구성되어있다. serverless.yml은 환경설정, handler.py는 실행함수파일이라고 일단 생각하자.
4. AWS 연동하기
배포를 위해 serverless 프레임워크와 AWS를 연동해보자.
4.1 AWS 권한 설정
- AWS 콘솔에서 IAM 서비스 클릭
- 탭에서 Users 탭 클릭
- Add User(사용자 추가) 클릭
- 액세스 유형 : [ 프로그래밍 방식 액세스 ] 선택
- 권한 : AdministratorAccess
위의 과정을 거치고 나면 액세스키와 비밀액세스키를 확인할 수 있다. 두 키를 잘 복사하자. download credential을 누르면 csv파일도 받을 수 있다. permission을 액세스 유형에 맞게 수정 가능 하지만 지금은 admin으로..
4.2 AWS 액세스 등록
아까 발급받은 액세스 키를 가지고 serverless 설정을 해준다.
serverless config credentials --provider aws --key {액세스 키} --secret {비밀 액세스 키}
5. 템플릿 예제 hello world 배포하기
템플릿 내부에 있는 예제로 작동하는지 확인해보자.
5.1 serverless.yml 설정
default에서 크게 건드리지 않고, 리전과 함수만 설정한다.
serverless.yml
service: srcr-etl
frameworkVersion: '1'

provider:
  name: aws
  runtime: python3.8
  region: ap-northeast-2
  memorySize: 1024
  timeout: 180

functions:
  hello:
    handler: handler.hello # handler.py의 function hello()를 의미한다.
    events:
      - http:
          path: hello
          method: get
default로 있는 handler.py는 다음과 같이 되어있다.
import json

def hello(event, context):
    body = {
        "message": "Go Serverless v1.0! Your function executed successfully!",
        "input": event
    }

    response = {
        "statusCode": 200,
        "body": json.dumps(body)
    }

    return response
5.2 배포
먼저 배포 없이 함수가 작동하는지 테스트를 해보자. serverless 프레임워크에서는 배포를 하지 않고도 따로 함수를 테스트할 수 있다.
sls invoke local --function hello
상태코드 200이 잘 출력된다.
{
    "statusCode": 200,
    "body": "{\"message\": \"Go Serverless v1.0! Your function executed successfully!\", \"input\": {}}"
}
이제 AWS에 배포하는 명령어를 작성한다.
sls deploy
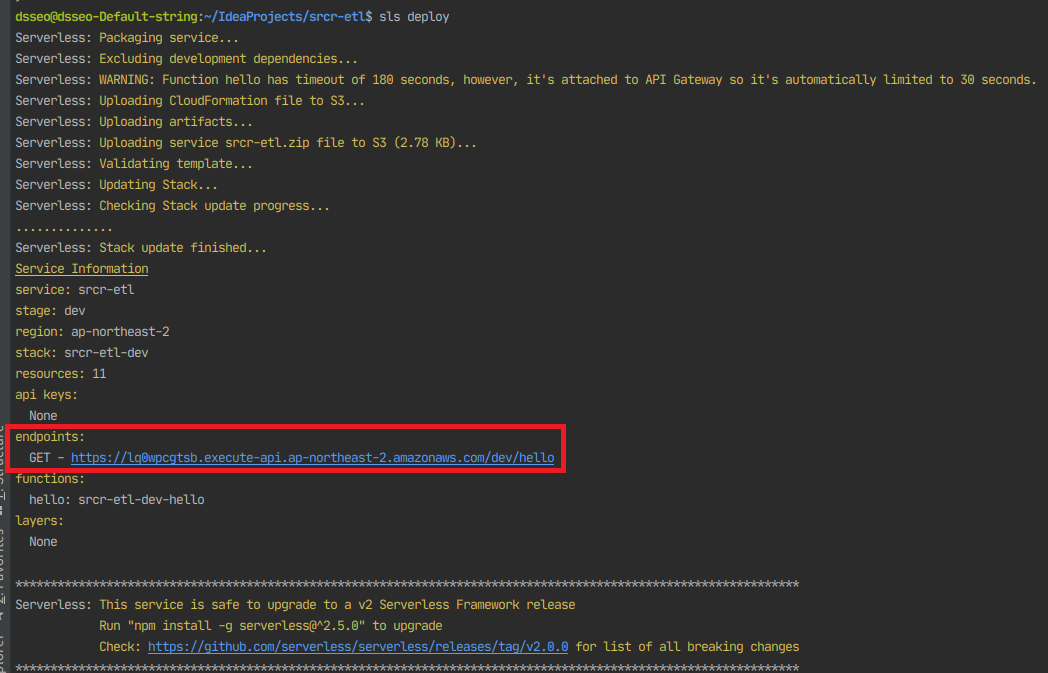
Service Information에서 endpoints 항목에 GET method에 대한 url이 표시되었다. 이 url을 클릭하면
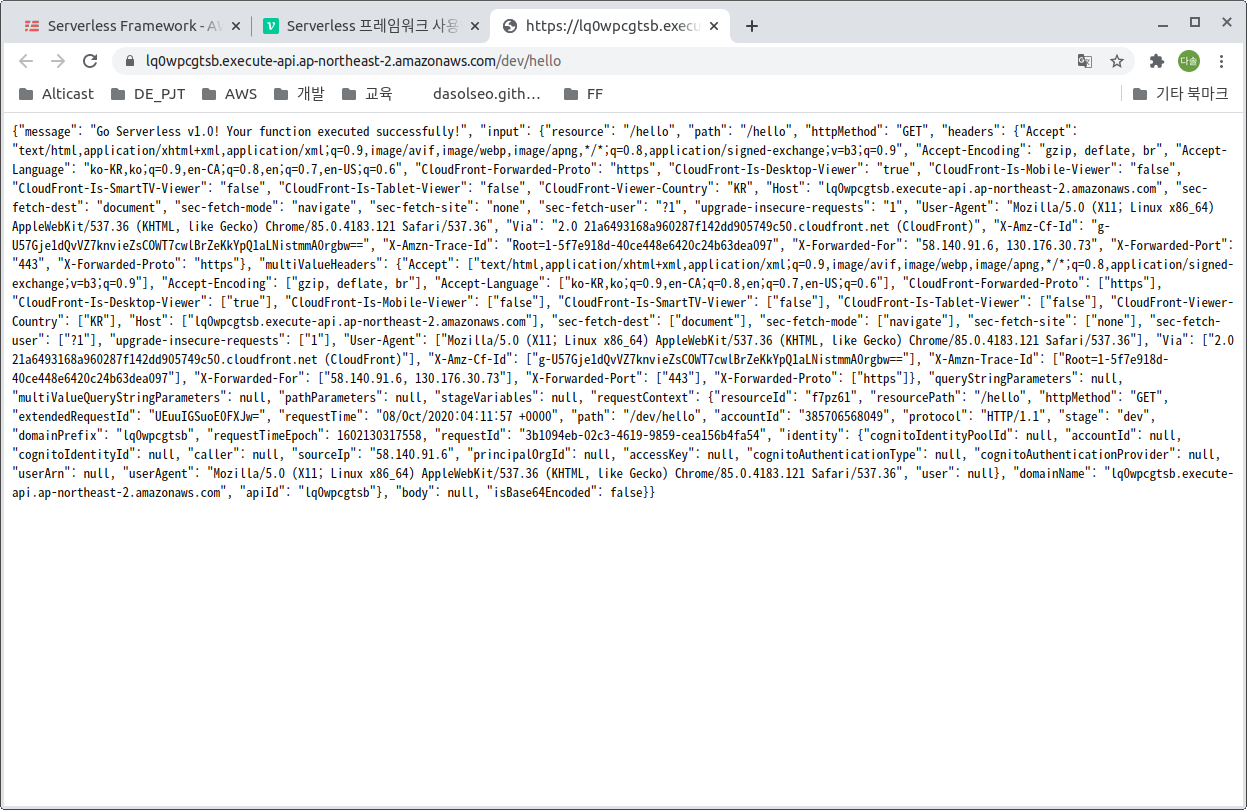
잘 배포된 것을 확인할 수 있다.
5.3 AWS에서 배포된 Lambda 함수 확인하기
AWS 콘솔에서 Lambda 서비스에 들어가보면, serverless 프레임워크에서 배포된 Lambda 함수를 확인할 수 있다.
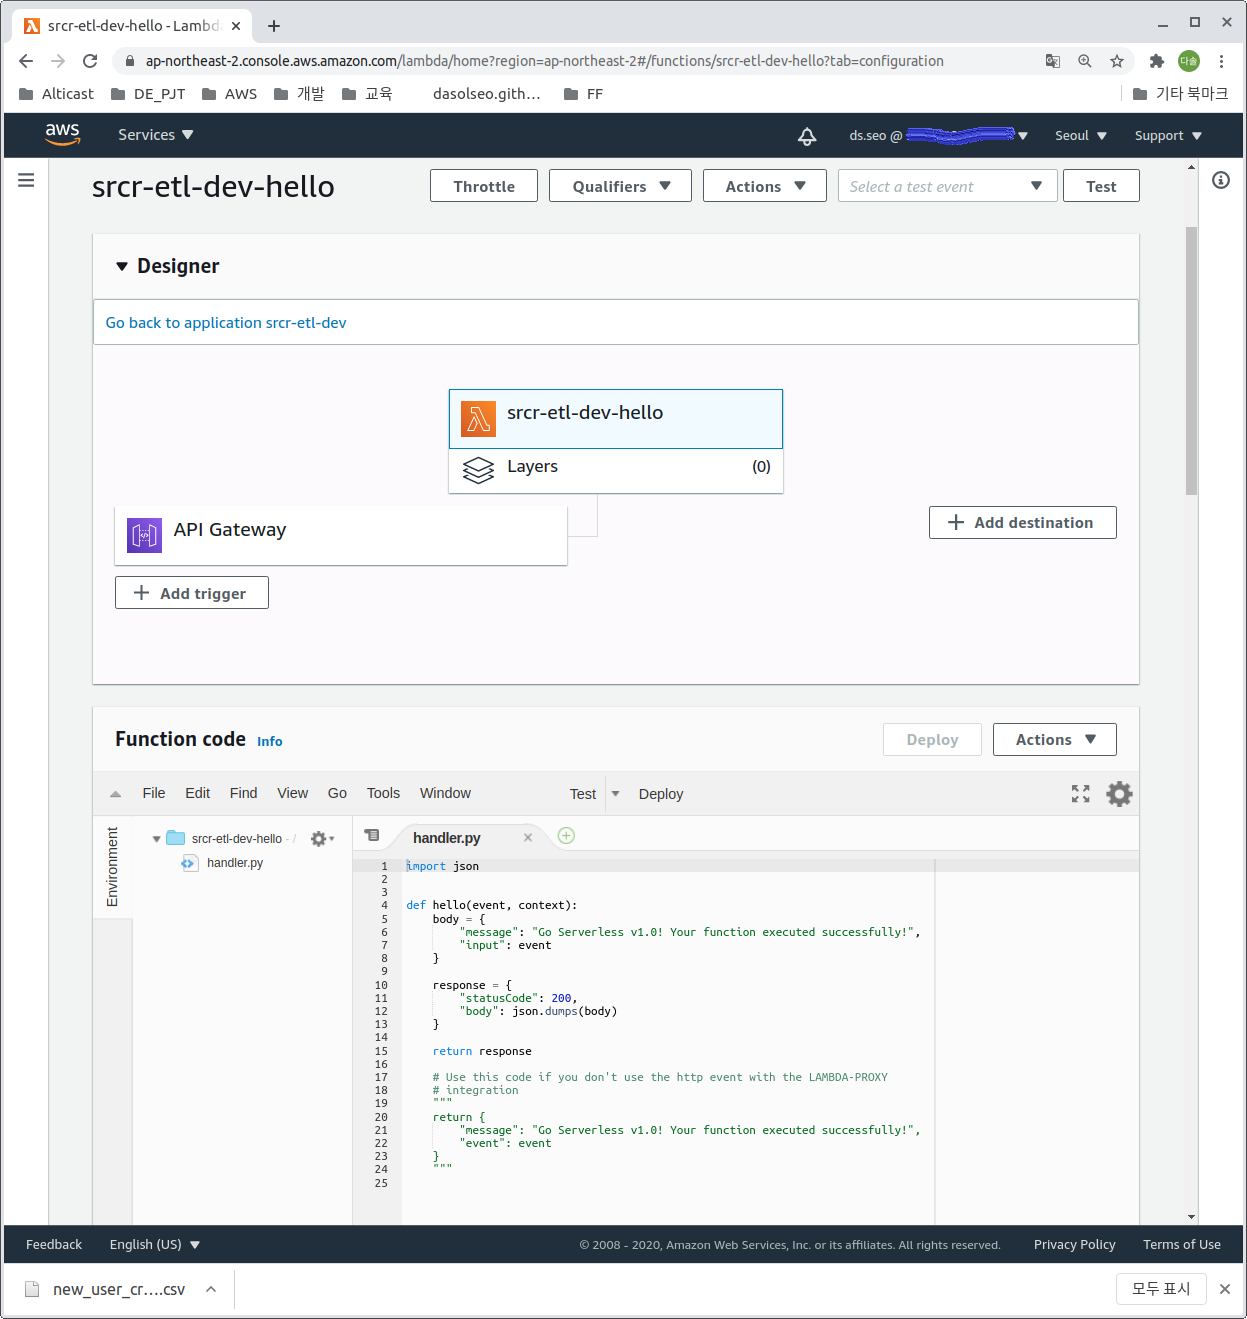
이제 serverless 프레임워크 사용을 위한 준비가 끝났다.
